Sunday, February 15, 2009

Photoshop Brushes

Photoshop provides its users with a powerfull brush palette.These brushes options are numerous and just great:we'll just create a custom brush that we'll be able to save and use later.

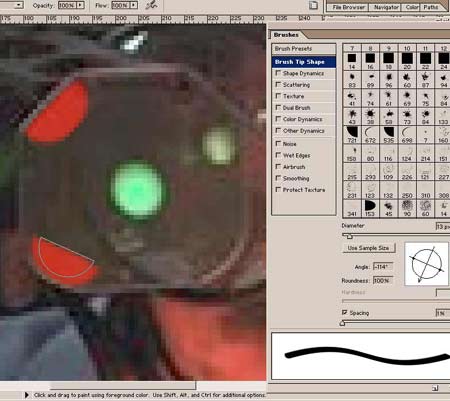
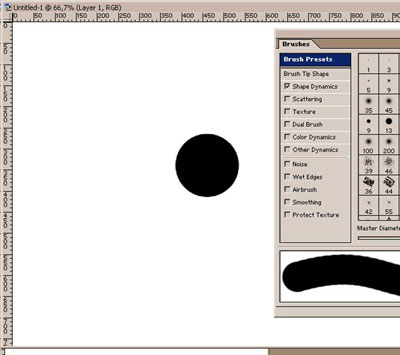
Create a blank document,with a white background, press "B", and "F5" to open the brush palette, and get a circular hard brush:set it's diameter to 150, choose black color, and draw a single big black dot on the canvas.

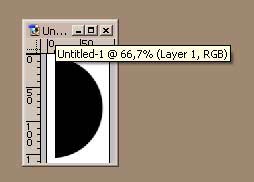
This dot is the shape of the new brush you wanna create: now alter it anyway you want: you can blur the edges to make a softer brush, or just cut one half, whatever: we'll just cut one half,and crop the pic so you get this result

Now, to save it, you can either go to "edit/define brush", or click the small arrow on the brush palette to open its menu and choose "new brush", give it a name, and you'll find it at the bottom of your brush palette.

This brush may look very simple, it's just one half of a dot, but it allows you to work on curved or straight edges without having to change between a circle and a square brush....it's a time saver, just keep your brush palette open, and change the angle of the brush:

I made a whole set of stencils for myself so I can esaily work on selections in quick mask mode.

Further, you can use all these brushes for erasing, stamping, etc...for example,press (E) and "F5", and just choose the shape/options you want. This is especially usefull for creating scratches, dust, or any organic pattern.

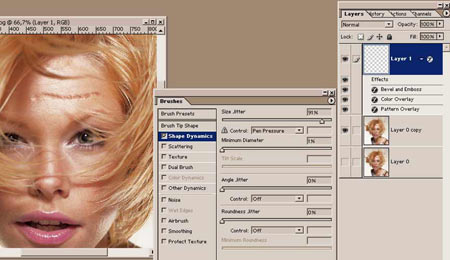
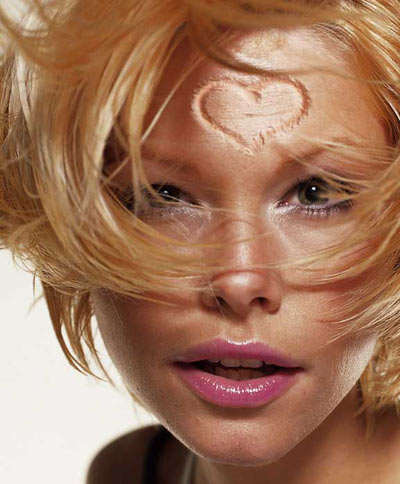
OTHER OPTIONS: We have only used the basic options so far, but others are almost as usefull:on the pic below, I used the shape dynamics/size jitter option, set to 100, to draw an irregular shaped scar on the girl's face, and the brush option was associated with layer options to make the stroke look like a scar:

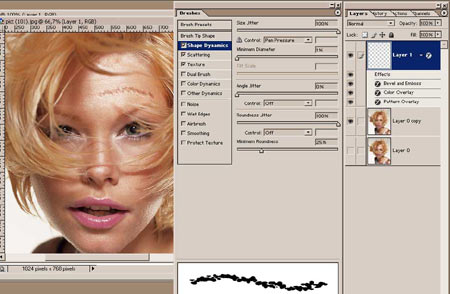
On the next, I set the brush opacity to 70, added some texture and set "roundness jitter" to 100 for more realism.

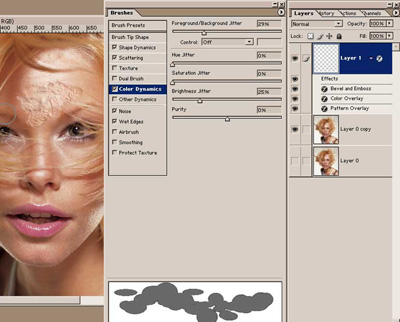
On the following pic, I added some some saturation jitter(color dynamics, wet edges, and noise), to make it even more messy.

You could also try different brush shapes ! what about a nice heart shaped scar?

There are hundreds of possible combinations of options, just try them so they serve your needs.


Cut and Paste Options

The most important thing to master in Photoshop is how to perform perfect cut/paste operations.You may want to try effects, or illustration, a great pic is always simple, and CLEAN. No blurry edges.

There are many ways people like to select objects: you can isolate a RGB channel to focus on the one that is the most contrasted, or you may want to use the magic wand (W) with different levels of tolerance, or use the pen tool (P) and draw the edges, then transform the path into a selection.The last one is very precise, but not as much as editing in quick mask mode , and slower.

The quick masks work as a mask you would just cut in order to preserve a part of the image you don't want to edit, and they are bitmaped fill shapes, therefore you can paint them, erase them, blur them, whatever. let's have a try:

Open a pic and prepare your document as taught in my first tutorial.

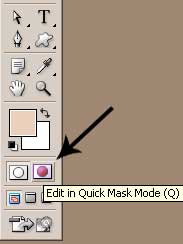
Enter quick mask mode either by pressing "Q" or by clicking it.

Select a brush: you amy choose between a soft or hard brush: hard brushes will give the most precise results, but ask more work.

Paint the part you want to select: the selection will appear as a red shape

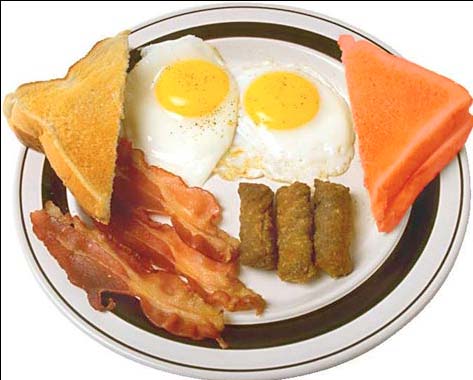
Here we wanted to select one of the toasts

You can easily change your the shape, size or angle of your brush by pressing "F5",according to the size of details you want to paint over.here's what you see once you have masked the toast.

Then leave the Quick mask mode by pressing "Q", and see if the selection suits you, if it doesn't just go back to quick mask mode and erase/paint the parts that you dont like.

Your selection is ready.

This is especially helpfull for low res pics , or when the edges are not obvious: it lets your eye choose what to keep, and what to cast, and it's always better than to let Photoshop do it for you.

Once you have your selection ready, save it ! you can either save it with "select/save selection/new channel", or create a mask layer,so you can use it later:

a: create a new layer on top of the selected object

b: fill the selected area of the new layer with black or white

Now you can recall the selection by simply CTRL+clicking on the mask layer, even when it is hidden.

Practice this on different pictures: hair, clouds, grass, objects, whatever.

This allows you , like vector based selections , to work in a non destructive way, so you can always go back and try something different.

Photoshop Introduction

You may find just as many tutorials as you want on the web,the fact is that most of them will show you how to replicate an effect, etc....which is pretty useless, as long as many people dont know the basics of Photoshop. These tutorials will try to teach you how to use Pshop by yourself, not in order to make effects, but in order to edit photographs.

1: Before we start

Photoshop was a tool made by photographers, for photographers, there fore you have to understand that you have to get some basic knowledge about RGB, and bitmap.

Every photograph has a bitmap format, which means it is composed of pixels; you can edit any of these pixels properties. RGB is the colour mode that will most often use: Red, Green, Blue; these colours work in an additive mode, which means that any other colour will result in the addition of one the fundamental Red, green, and Blue.This will be usefull when you get to work on layer blending modes.Filters were basically the same ones as you found on cameras, so try to think of them in a photographic, non illustrative way.

2: Preparing a document

Whether you want to edit a picture or create a new document, you'll have to do one or two things in order to ease and secure your workflow:

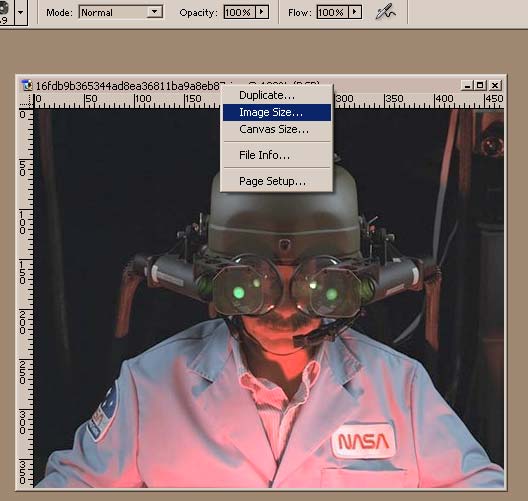
a:increase the resolution: you'll have to work on details, so just go to "edit/image size" and enter 300 dpi instead of 72, or do the same operation by right clicking on the pic's menu:

b:unlock the background layer, by simply double clicking on it and hitting enter, so you can edit it.

c:duplicate this layer so you can alter it and restore it if needed.

d:hide the lowest layer so you actually see how you alter the layer you're editing.

3: Separating elements

You may want to seperate the differents elements of the picture to get them on different layers.It is useless if you plan to use only a small part of it, but in case you don't know what to do with your pic, just separate the elements : it will help you get ideas as you you can try to put them in different settings, etc...

4: Get to work

Whatever you'll want to do, you have two options that may help you secure your document:

a: duplicate every critical layer before you alter it

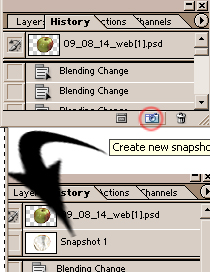
b: take snapshots of its history before every critical operation

These tips may sound a bit boring, but these are the ones you'll want to use when you have to work on a document for hours, or after you have experienced the disappointment of not being able to undo.

General Design Tips

Photo editing, or illustration may be practiced for fun, but no one can pretend being a "designer" without knowing the rules of graphic design.Many people think that being original, and thinking out of the box is a good thing, but it actually isn't if you don't follow the rules...Even the weirdest looking ads,or the funniest ones, follow these rules.

You have to know that the colors that are used in a picture always give a feeling to its spectator; colors are assiociated with feelings, mood, temperature, concepts, they are true symbols; for example , you may have noticed from watching ads, or packages, that white and blue are associated with products that have hygienical purposes, or that plain red is used to warn for danger, or that purple is used for expressing wealth, or luxury.Just because these colors have a true meaning in everyone's mind.

As you always have to keep this in mind when you design something, you have to remember not to please yourself, but to please the consummer, and that the picture you make should not express your own feelings, but a message.

On the other hand, when you make a picture with an artistic purpose, you have to express your own feelings, whatever they might be, but in these two different situations, colors are tools that you have to master.Therefore, you should always remember that the viewer's eye may be more sharp, accurate, sensitive, than yours.

Shapes:

Whether you work on a photography, or design a web page, or a logo, you should be able to see the basic shapes that compose it.The basic shapes you will use are square, circle, and triangle, any of them being composed of lines, and dots.

- the square expresses, or shows a structure, a frame.

- the circle has two properties: it is a target the eye focuses on, and it is also seen as an element of an organic, or abstract strucure (ex:molecule, planets, bubbles)

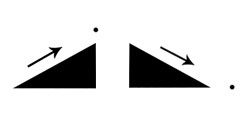
- the triangle is a perfectly balanced and stable shape that expresses energy.It can also show a direction when the size of its sides is altered.
Simplicity:

Here I want to demonstrate by the simplest possible way to make an "eye catching" picture: the last 20 years of advertisement have constantly tried to find new means of catching the consumer's eye, with flashy colors, pictures full of effects, they gradually put more and more things in the sceneries they created, untill it became too much, and meaningless.Here's the most eye catching picture you'll ever see:

This simple dot on a white rectangle is the structure used by almost every picture, poster ad, commercial web page, because our use of the latin alphabet got our brain accustomed to reading a page from its upper left corner to its lower right corner.In the pic, the grey rectangle is the frame that the eye watches into, the black dot is a target for the eye, and its power is multiplied by the highest contrast possible (B/W).If the dot had been a pale grey, it would have made the eye look for it, and concentrate on it, inducing questions into the viewer's mind ; if it had been a killer red, it would have been too agressive to be looked at.

Although all this may sound a bit too simple, or abstract, these are the basics of designing, and composing a picture.Every artistic director is aware of their importance. So just try to analyse the composition of the pictures you see around you, paintings, ads, web pages, book covers,...it will help you understand this, and assimilate these rules so you can use them efficiently.No way this small explanation could be complete, it just means to make you always remember that "the less, the better".Always ask yourself these questions before you decide your work is over:

-Does the foreground object really need a background ?

-What do my eyes focus on when I watch the pic ?

-Do the colors need to be more or less contrasted and saturated ?

-How much time does it take an average viewer to understand the pic ?

-Would I like this pic if it was made by someone else than me ? :)

These questions apply to designers, but also to artists, so always keep the layers in your PSD file handy so you can fix what you dont like.
Blending Layer Modes

The layers blending modes are the quintessence and the most powerfull aspect of Photoshop. They interact with eachother differently according to the colors and modes you use; but before get try some funny stuff, we should understand the basics:

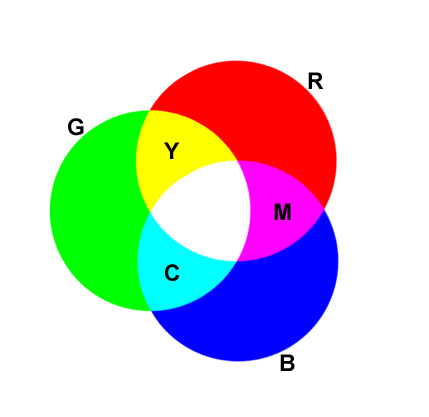
As said in the first lesson, RGB colors work in an additive way:

It means that when you mix two colors, the result will be a lighter color than the ones you used,the more you mix, the lighter it gets, untill it gets white.On the RGB pic I made , I used nothing but 3 dots and the "lighten" blending mode.RGB colors work in the opposite way of CMYK, with are "substractive" colors (the more you mix, the darker it gets).

You do not need this to use the layers blending modes for fun, but you need it to understand how they work, because when you blend layers, you decide what way their colors interact.

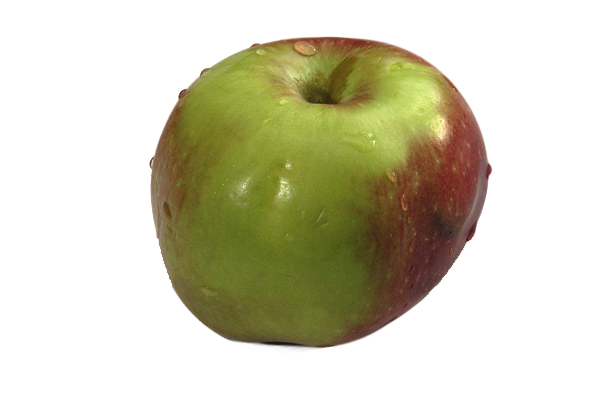
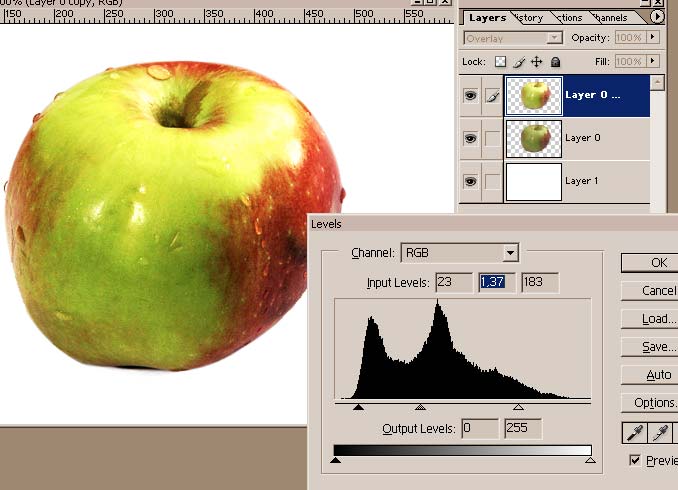
Now you know this, let's try something fun. View the apple pic and get it ready to be worked on: separate, adjust colours, duplicate layers.For trying something different, just duplicate the apple layer and choose "overlay" mode for the top layer, it will make the pic look much better, then just use ctrl+L to adjust it. It looks ok to me:

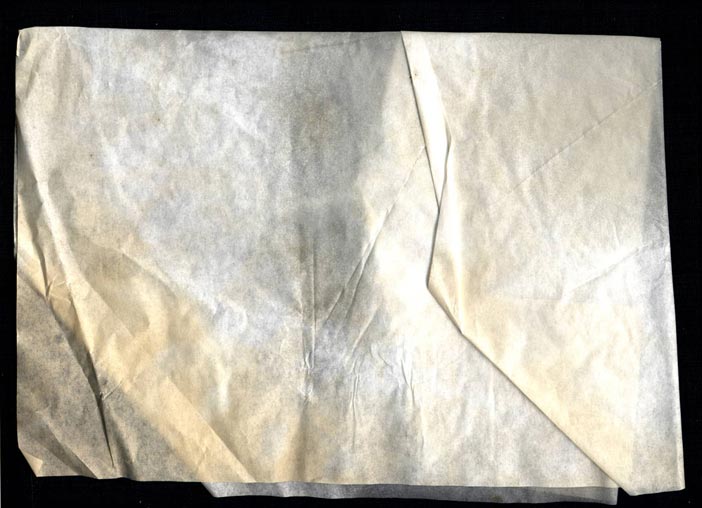
Open the paper texture pic:

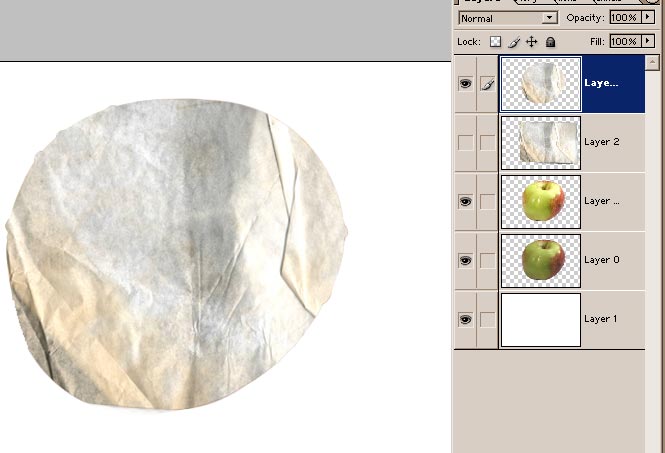
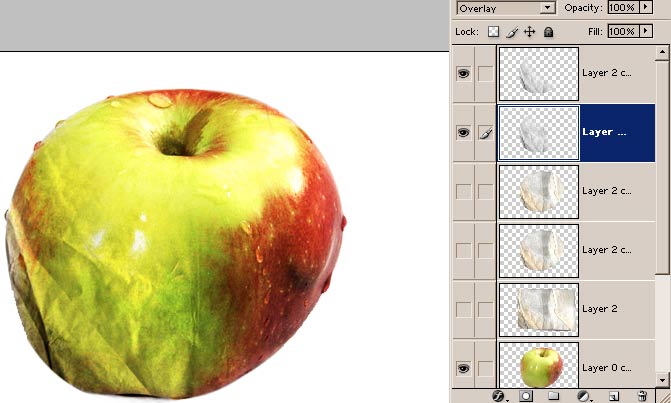
Prepare it, and paste it into the apple pic, on the top of the other layers.Resize it, place the fold into the apple, and do this: have the paper layer selected, CTRL+click on the apple layer, CTRL+SHIFT+I and delete , in order to cut the paper that is out of the apple's shape. Duplicate it for safety:

Now ,before you try things, take a new history snapshot: it will allow you to go back to this state of the document whenever you want just click on the "new snapshot" thumbnail to go back.

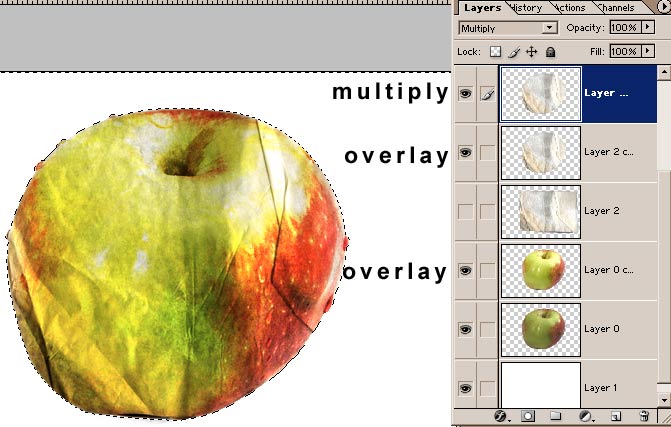
Desaturate the paper (CTRL+SHIFT+U) and just try all the color modes, because you may never predict exactly what result you could get, and so you get to know them all; personnaly, I prefer the result produced by the overlay mode.As the result is not obvious enough, you can either add contrast, or use the levels, I prefer to duplicate the layer and try another mode instead: chose "multiply" for the top paper layer, and the result looks cool:

Now I suggest we only keep the folded part of the paper, to make the difference between it's texture and the smooth spherical aspect of the apple.CTRL+click the apple layer, press CTRL+SHIFT+I,press "Q",get a large soft brush and paint the parts you dont want to keep, the mask should look like here:

Press "Q",select the top paper layer and delete.Do the same on the other paper layer, press CTRL+D, the result you should have is the one shown here:

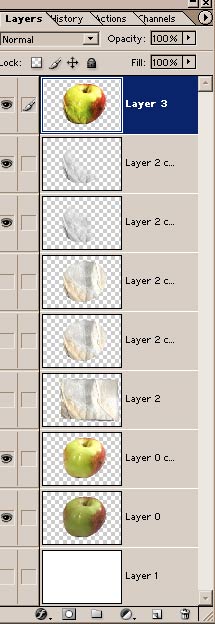
Create a new layer on the top of all layers, hide the white background, select the new layer, and press ALT+CTRL+SHIFT+E to merge all visible layers into the one you have just created:

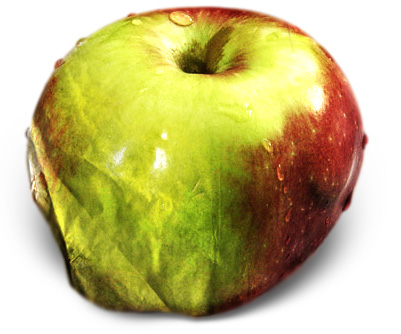
ALT+click on the eye next to the thumbnail to hide all the layers below, click the eye next to the background's layer to show it, now you can work on your apple.Press "E" and erase the parts you dont like, adjust the colors,soften the edges a bit, cast a shadow, and appreciate the result.

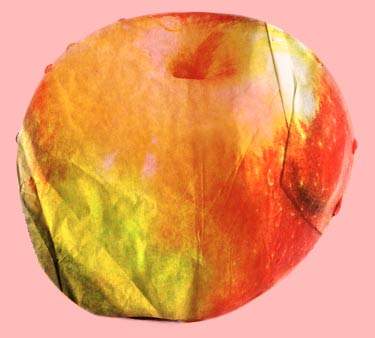
Et voilĂ  ! it may not be the coolest picture ever, but at least you've learnt how to use layers blending modes so you can try other pics by yourself. I tried to add a skin texture on the following. Try some and have fun.

Layer Blending Optons

As you may have noticed, the bevel option is very very cool, as it lets you make a pasted object more realistic, though it is more obvious when it is set with a background, so the depth cue is more obvious.When you buy Photoshop, you discover you have many layer styles that are pretty useless, according to me they are just included so you get to learn how they work.

Now we'll learn how to texturize an object:

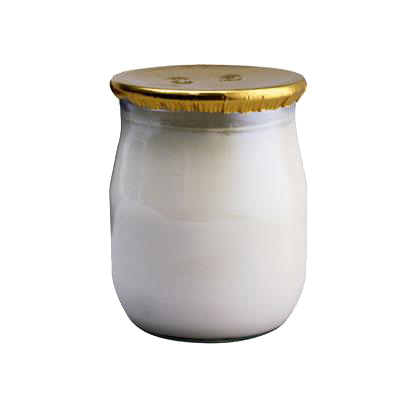
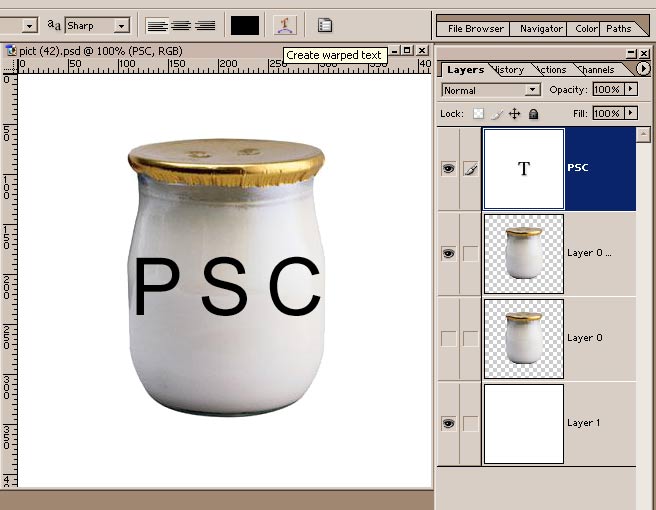
Prepare the pic, and create a new blank layer on top of the yoghurt(CTRL+SHIFT+N). Press (T) and type a big "PSC" , and use the warp text button shown:

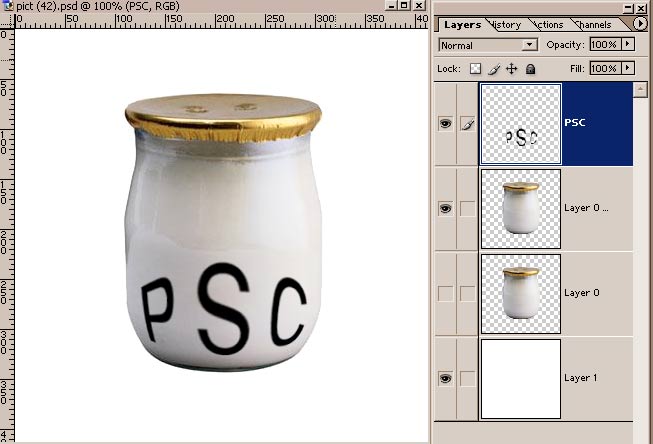
to warp the text with "bulge", so it fits the yoghurt.Rasterize the text layer, and CTRL+T to add perspective and distort it.Then CTRL+CLICK the yoghurt layer so you load its transparency map as a selection on the text layer, press CTRL+SHIFT+X to enter "liquify", use the "bloat brush"(B) to stretch the text, press enter,CTRL+D to deselect, and CTRL+T to transform it so it fits the glass perfectly, so you get something like this:

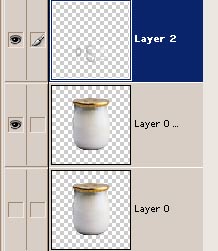
Now select the yoghurt layer, and CTRL+CLICK the text layer, so you load its transparency map as a selection on the yoghurt layer,CTRL+C/CTRL+V, hide the top text layer, you'll get this:

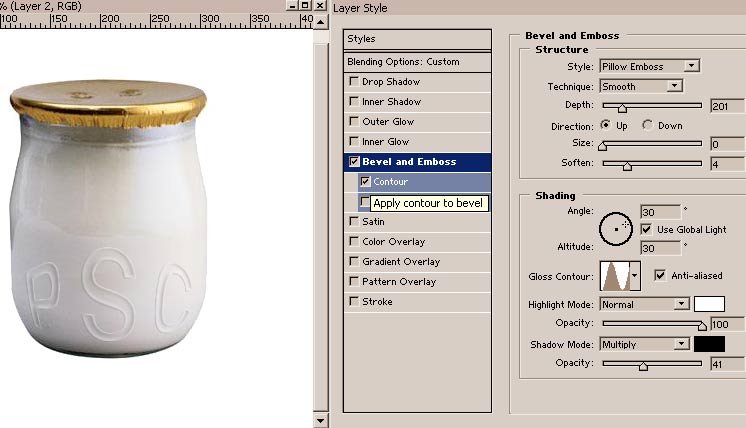
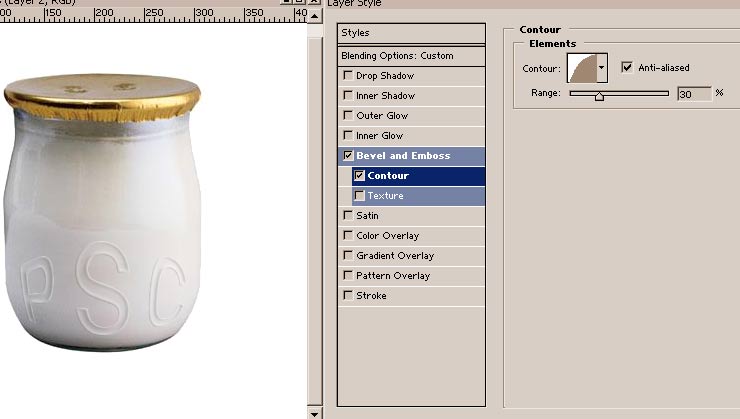
Now we have a text shaped part of the glass...double click its layer thumbnail to enter the options: we'll make a beveled text effect on the glass. Activate "bevel/emboss": I chose the settings shown:

to make the bevel boss, with some thin carved edges, so the text appears like it was stamped onto the glass; the gloss contour should be irregular as glass is organic, so it replicates the kind of refelection it would produce...look at the settings and try others by yourself.I checked the contour option to make the edges look more precise.

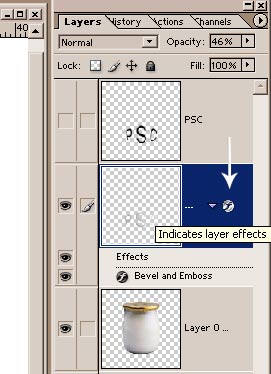
Press ENTER to validate your options, and add a 0,3 gaussian blur.AS I didn't really like the result, I lowered the layer's opacity and transformed the text again.I also scaled the effects to 10% by clicking the "f" icon on the layer and chosing scale effect.

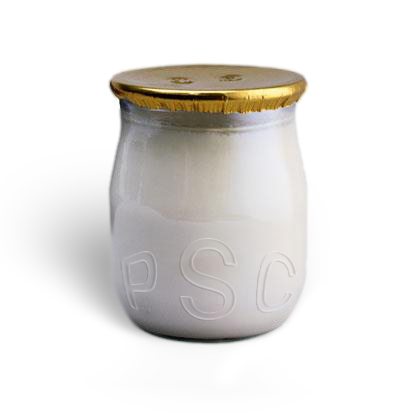
I added a shadow, and I like it enough to say it's over.

Color and Luminosity

Color modes , luminosity, and printing basics


Light is the basis of photography, therefore it's the part one has to master in order to produce consistent pics, but it is also the toughest part.From correcting the colors, the exposition, painting the highlights and shadows, and/or reflections, handling glossiness, light should be the center of your preocupations.

This photo was quickly enhanced : the overlay mode lets you emphasize every aspect of the pic, and is very usefull to add definition and to raise the overall contrast, but it also tends to saturate/flatten the colors.


The first thing to notice in a pic is the nature of the lights it contains: is it a direct light (a bulb or spotlight), an ambient light ( like in a very foggy weather), or a sunlight, or a non dirct light ( when an object receives the light from another object, by reflection, ie a person receives light from a white wall, or a gobo).Each type of light has its own ways to diffuse colors, create highlights and shadows, etc.

Important: you have to be aware that all these enhancements are made without taking care of the printing process, and especially shadows and highlights need adjustment to be printed properly.Using the overlay mode often saturates the colors, which may not be visible on a monitor, but will give horrible results on paper: ie, a saturated highlight will give a white, unprinted stain on the paper.

Anyway you have to make the luminosity of the shadows/highlights match the one of the pic you work on.A pic with low contrast, but highly contrasted shadows/highlights will suck, try to abuse the levels on a random pic to have an idea of the result.

Photoshop was invented before web graphics , and was develloped in order to fullfill the needs of prepress operators; the web graphic designers do not have to deal with other color modes than RGB and web color modes, which means they handle Photoshop in the easiest way they can, unless they have to submit a printed project before they start working.In this case, they need to handle CMYK, and alter the colors in their pic so they are printed correctly :A job in itself, ask Jerry717.

Each work space has uses its own color mode:

-The monitor uses additive color, composed of combinations of red, green and blue, emited from the monitor.

-A printer uses substractive colors, composed of combinations of Cyan, Magenta, Yellow and Black, which are the colors of the inks used by the printers.the range of colors they can produce (gamut) is narrower than the one of RGB.This is why some colors produced on a monitor in RGB mode will not be printed at all.

-Photoshop uses the LAB mode, which contains all the other existing modes.It means that the LAB mode has the widest gamut, containing all the colors available.L stands for luminosity, A is the green/red value, and B is the blue/yellow value.The programm uses this mode every time you convert a pic from a color mode to another, so it has absolute values.

Having to handle these modes will make you use photoshop commands and options you may have never heard of, though they exist for sure.Let's try something: imagine you have chopped a nice pic for an ad that will be printed in a magazine.You've been working as usually in RGB, and you convert it to CMYK before you send it to the printer.If you think your work is over you have 90% of chances not to get paid.For the example I took a pic I made some time ago, no showoff intended, just an example...

I saturated the colors a bit so what I want to demonstrate becomes obvious.the original is pic 3.Pic 4 is what you get when you set the proof colors options on, with for example the japan 2001 coated profile, and gamut warning on.


pic3


pic4

Now you see how the pic that looked so nice on your monitor would end up once printed on a japanese printer.The gamut warning shows you that some colors just wont even be printed, flattening highlights and shadows.Here, the usual RGB tricks don't work.You have to correct each color channel to desaturate it, so its luminosity can be printed: you can do it in so many possible ways that I'll only mention a few; you can use the replace color command, or the levels/curves/hue commands on a selected color, or channel, you can paint over the unmatching color, use some blending modes tricks...The best solution would have been to start working on the pic in the proper mode, with the proof color and gamut warning options on.

Whatever the calibration device you use, you'll always have to proof your pic by printing it on the printer's device, because the way printers handle colors is different from one printer to another, even if the printer's model is the same.That's why I say that amateurish and professionnal photoshopping are totally different: working in RGB, 72 ppi, allows one to make technically sharp pics, but having to work in CMYK 300 ppi (at least), having to prepare, correct and enhance the colors, and proof them wont let one a single second for creative research.The fact is there are thousands of good photoshoppers on the market, considering themselves as "above the rest", or avant-garde, but there are no jobs for them, unless they are asked to produce graphics that will only be displayed on a monitor.Using 50% of the program doesn't make them professionnal choppers, and they wont be allowed to express their creativity unless they can make their pics look good on paper (try view/proof setup/simulate paper black/ink black to have an idea of the result).