The most important thing to master in Photoshop is how to perform perfect cut/paste operations.You may want to try effects, or illustration, a great pic is always simple, and CLEAN. No blurry edges.
There are many ways people like to select objects: you can isolate a RGB channel to focus on the one that is the most contrasted, or you may want to use the magic wand (W) with different levels of tolerance, or use the pen tool (P) and draw the edges, then transform the path into a selection.The last one is very precise, but not as much as editing in quick mask mode , and slower.
The quick masks work as a mask you would just cut in order to preserve a part of the image you don't want to edit, and they are bitmaped fill shapes, therefore you can paint them, erase them, blur them, whatever. let's have a try:
Open a pic and prepare your document as taught in my first tutorial.
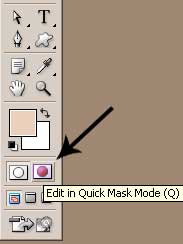
Enter quick mask mode either by pressing "Q" or by clicking it.

Select a brush: you amy choose between a soft or hard brush: hard brushes will give the most precise results, but ask more work.
Paint the part you want to select: the selection will appear as a red shape
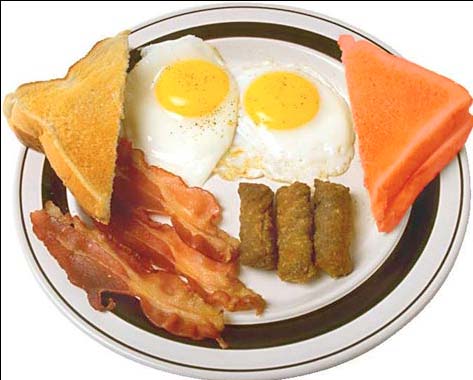
Here we wanted to select one of the toasts
You can easily change your the shape, size or angle of your brush by pressing "F5",according to the size of details you want to paint over.here's what you see once you have masked the toast.

Then leave the Quick mask mode by pressing "Q", and see if the selection suits you, if it doesn't just go back to quick mask mode and erase/paint the parts that you dont like.
Your selection is ready.
This is especially helpfull for low res pics , or when the edges are not obvious: it lets your eye choose what to keep, and what to cast, and it's always better than to let Photoshop do it for you.
Once you have your selection ready, save it ! you can either save it with "select/save selection/new channel", or create a mask layer,so you can use it later:
a: create a new layer on top of the selected object
b: fill the selected area of the new layer with black or white
Now you can recall the selection by simply CTRL+clicking on the mask layer, even when it is hidden.
Practice this on different pictures: hair, clouds, grass, objects, whatever.
This allows you , like vector based selections , to work in a non destructive way, so you can always go back and try something different.
No comments:
Post a Comment