The layers blending modes are the quintessence and the most powerfull aspect of Photoshop. They interact with eachother differently according to the colors and modes you use; but before get try some funny stuff, we should understand the basics:
As said in the first lesson, RGB colors work in an additive way:
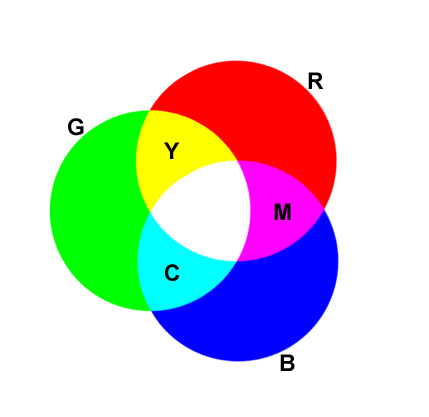
It means that when you mix two colors, the result will be a lighter color than the ones you used,the more you mix, the lighter it gets, untill it gets white.On the RGB pic I made , I used nothing but 3 dots and the "lighten" blending mode.RGB colors work in the opposite way of CMYK, with are "substractive" colors (the more you mix, the darker it gets).
You do not need this to use the layers blending modes for fun, but you need it to understand how they work, because when you blend layers, you decide what way their colors interact.
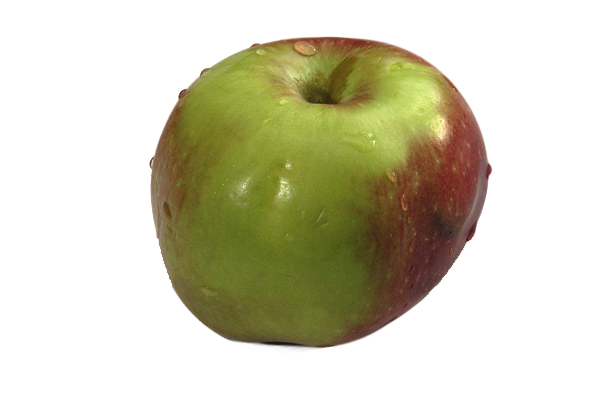
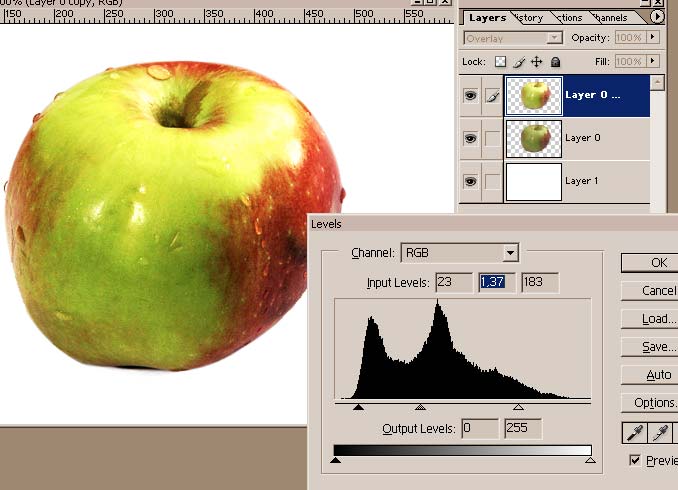
Now you know this, let's try something fun. View the apple pic and get it ready to be worked on: separate, adjust colours, duplicate layers.For trying something different, just duplicate the apple layer and choose "overlay" mode for the top layer, it will make the pic look much better, then just use ctrl+L to adjust it. It looks ok to me:
Open the paper texture pic:
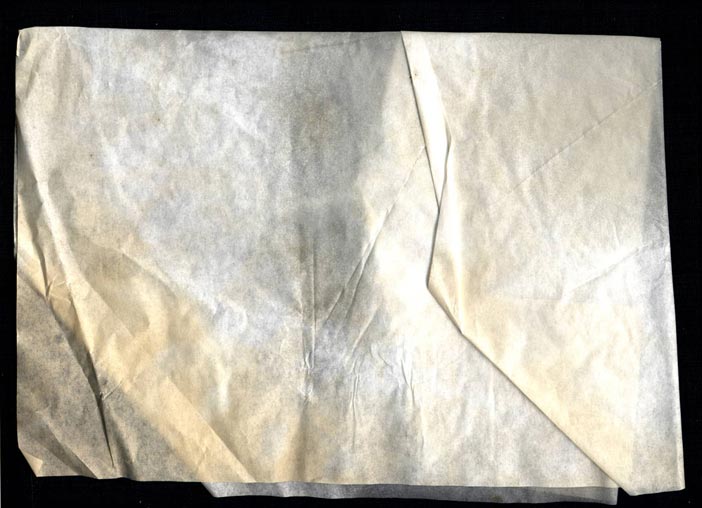
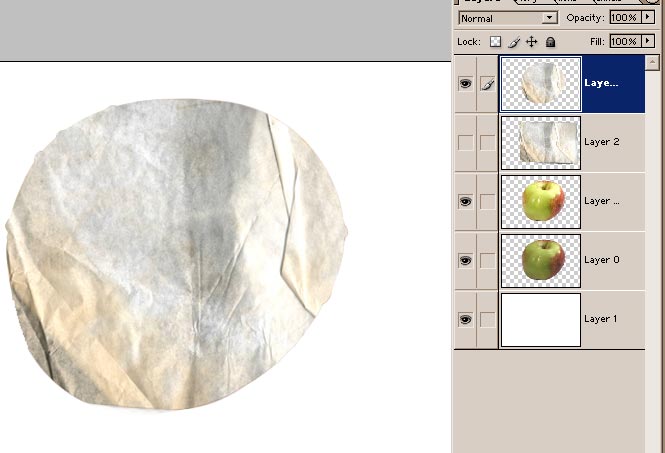
Prepare it, and paste it into the apple pic, on the top of the other layers.Resize it, place the fold into the apple, and do this: have the paper layer selected, CTRL+click on the apple layer, CTRL+SHIFT+I and delete , in order to cut the paper that is out of the apple's shape. Duplicate it for safety:
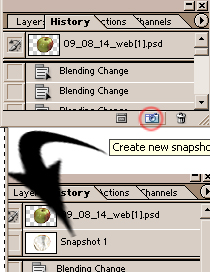
Now ,before you try things, take a new history snapshot: it will allow you to go back to this state of the document whenever you want just click on the "new snapshot" thumbnail to go back.
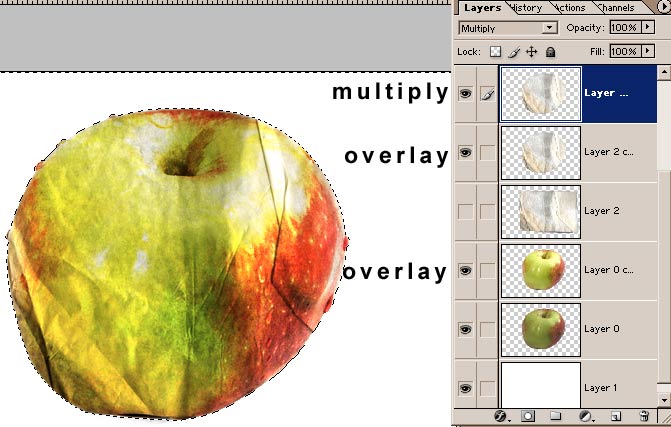
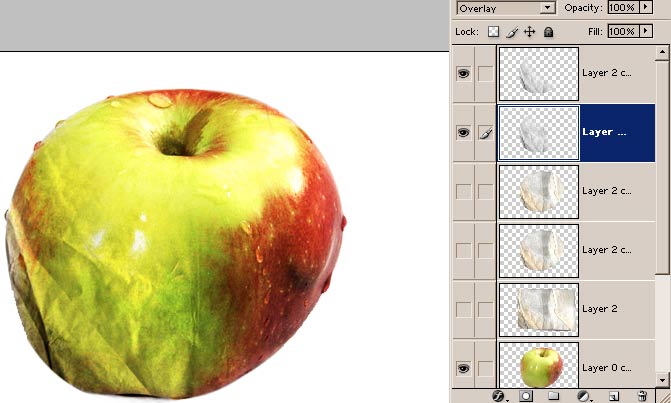
Desaturate the paper (CTRL+SHIFT+U) and just try all the color modes, because you may never predict exactly what result you could get, and so you get to know them all; personnaly, I prefer the result produced by the overlay mode.As the result is not obvious enough, you can either add contrast, or use the levels, I prefer to duplicate the layer and try another mode instead: chose "multiply" for the top paper layer, and the result looks cool:
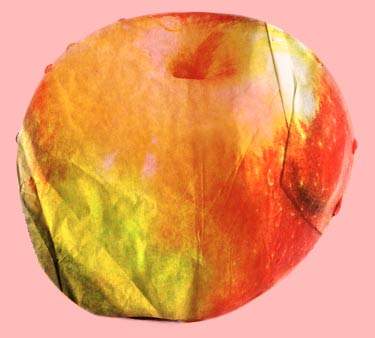
Now I suggest we only keep the folded part of the paper, to make the difference between it's texture and the smooth spherical aspect of the apple.CTRL+click the apple layer, press CTRL+SHIFT+I,press "Q",get a large soft brush and paint the parts you dont want to keep, the mask should look like here:
Create a new layer on the top of all layers, hide the white background, select the new layer, and press ALT+CTRL+SHIFT+E to merge all visible layers into the one you have just created:
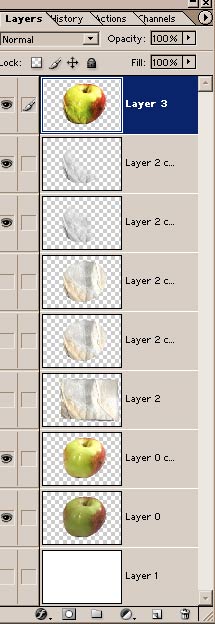
ALT+click on the eye next to the thumbnail to hide all the layers below, click the eye next to the background's layer to show it, now you can work on your apple.Press "E" and erase the parts you dont like, adjust the colors,soften the edges a bit, cast a shadow, and appreciate the result.
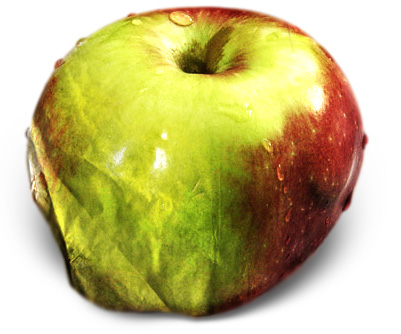
Et voilà ! it may not be the coolest picture ever, but at least you've learnt how to use layers blending modes so you can try other pics by yourself. I tried to add a skin texture on the following. Try some and have fun.

No comments:
Post a Comment